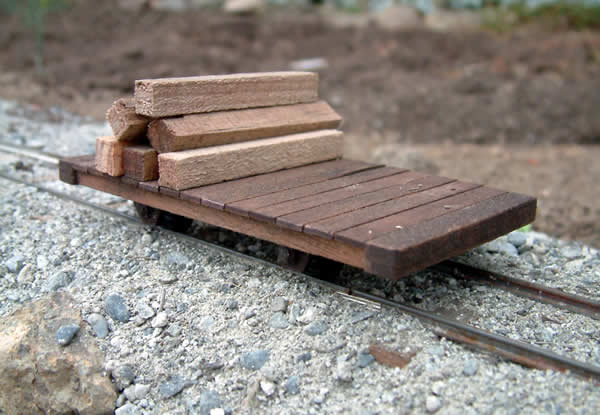
Being a bit bored one night I decided to build myself another wagon. As a challenge, I wanted to see if it could be done in just 3 hours, start to finish. Here's the result...
- 2 HO/OO wheels, with Extra Coarse Flanges (tm) - see first attachment
- a couple of nails about 50mm/2" long that are a tight fit inside the wheels
- ~36" of 7x1.5mm (or whatever) strip wood - (decking)
- 8" of 5x5mm strip wood - (side beams)
- 5" of ~7x7mm strip wood - (buffer beams)
- some axle boxes (I cast my own and it still took less than 3 hours!)
1) Cut your 36" of strip into about 13 x, 2 1/2" lengths (or whatever width you want the wagon to be). These will form the deck.
2) Cut your 7x7mm wood into 2 x 4" lengths (or whatever length you want the wagon). These form the supports for the deck and also hold the axle boxes in place.
3) Trim your 5" of chunkier wood to the same length of the deck boards.
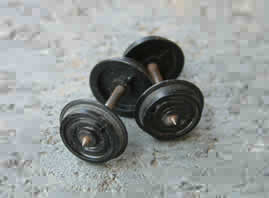 I'm sure we all have bizillions of over scale, over flanged wheels from our OO/HO days. I sure do. If they're the older kind which fit onto steel axles then we're in luck. (Attached is a pic of a couple)
1) Pry off wheels. Twisting them should be enough.
2) Some of them have different diameter axle on each side of the wheel (pinpoint bearings or something). If so, open out the holes to the same diameter.
3) Now find a nail about 2" long that the wheels will fit snuggly onto.
4) Trim to length and sharpen the ends (try using the drill & a file as a lathe!)
5) Super glue the wheels in place.
Stand back and admire your handy work!
 Over here in Little Ol' NZ you can't easily get hold of necessities like these, so I decided to cast my own.
1) Make a master out of brass, cardboard, whatever.
2) Coat liberally in vasoline.
3) Drown in Plaster of Paris
4) Wait a couple of days / bake the mould dry
5) Melt some white metal / pewter or if you're really depserate, solder. I find a 1" baked bean can burning meths produces plenty of fumes, er, heat. The metal is held in a little tin trough with pliers till it melts.
6) Pour into mold (I'll post a pic of my very crude setup sometime). Helps if you have a lid for the mould with a pouring hole.
7) Tap mould a couple of times while metal is still molten. This gets rid of air bubbles etc.
8) Wait, then extract casting.
9) Rinse & repeat till you get 4 you're happy with.
10) Clean up, drill holes for axles, degrease, prime and paint.
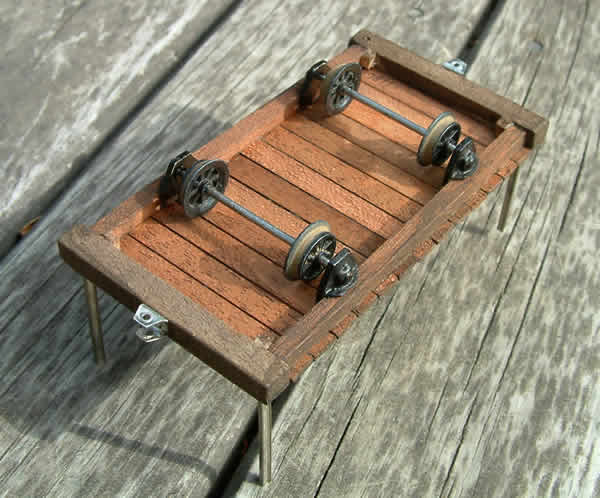
With all your ingredients within handy reach it's time to start building this baby.
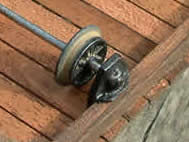
1) Take your side beams and superglue the axle boxes on, centred about 1" from each end.
2) Place side frames on flat surface, insert axle between and work out what distance apart they should be (50mm here)
3) Glue a couple of blocks on each buffer beam at this distance apart. These will help hold the side beams in place. (see attached photo)
4) Once they're dry, glue the side beams on (don't forget to put the wheel sets in!). Make sure that when the planking is put on top, it will be flush with the buffer beams.
5) Wait for glue to dry. Turn over and start gluing the decking on. I find it best to start at each end and work toward the middle. You may like to have a dry run first.
6) Place in over at 275ºF for, oh, wait, umm... leave to dry :)
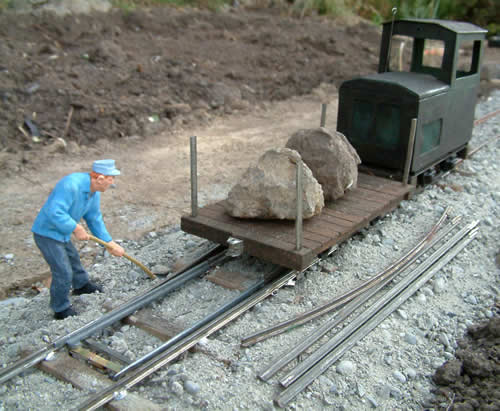
The wagon should be complete now, save for couplings (I leave that to the builder) and painting. For my wagons I found a revolutionary new paint product called Genuine Gunk. Really easy to make. Take one old oil can, covered in years of oil, dust and general muck. Collect all this gunk, then mix in a little turps to thin it down and simply paint on the wood. It looks and smells like the real thing :D
Hopefully this gives you a reasonable idea of how to make a wagon nice and quickly. It should look most appropriate sitting behind a Lister.