Idris is a rather well known little 16mm loco by Dave Watkins, who has published the plans online for all to see and use. Since Idris is a relatively simple live steam loco, I chose this to be my first foray into model engineering and the world of live steam.
She has been years in the making. My lack of a lathe didn't help matters and a continual lack of tools and materials has held back progress. At times frustration has bogged things down as well and that was partly what led to a radical simplification of the overall design.
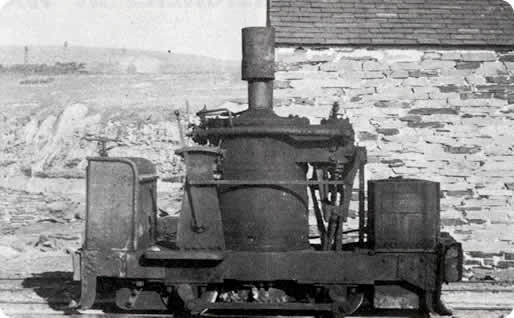
Idris is technically a steam engine. But she sure doesn't look like it! Locos like this are more commonly known as coffee-pots since the boiler is vertical.
Surprisingly enough Idris does exist in real life, as Chaloner (also George Henry), a De Winton built way back in 1877! She was most probably used for transporting slate from the mines to the standard gauge railways.
Dave Watkins page on Idris contains both the downloadable instructions and plans in a variety of formats.
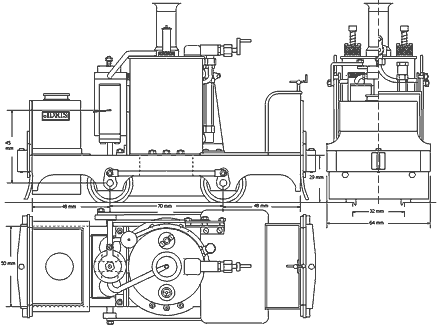
(General arrangement drawing of Idris)
Without further ado lets start building Idris. One note: it'll take a very long time to complete. It's taken me over two years already and there's still plenty left to do! But it is worth it.
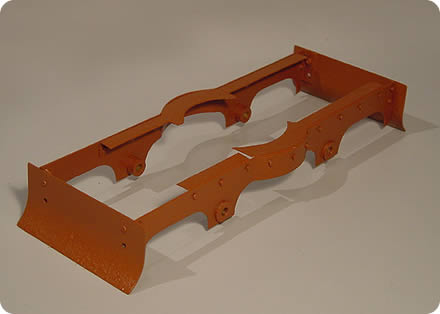
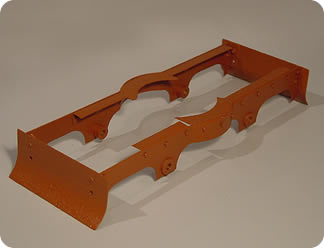
First thing is to get all the materials. Although Dave Watkins is rather precise in his materials, I've found that all sorts of things can be used instead. I'm using Zincalume for the frames and whatever else I can find for the rest!
Make sure that these are square! Other than that not a lot to say. I used little steel nails as rivets through the frames and into the brass angle. I soldered them on the brass side, so they really do act as rivets!
Also, for the bending of the frames, nothing hard about them. Just find something about the right size and bend them round that. Then use a pair of pliers to bend the frames back into shape in the appropriate places.
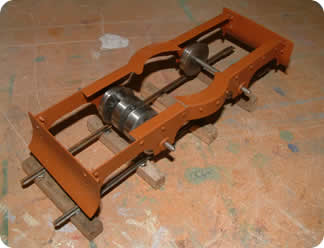
You'll need a lathe for this part. I used Leadbright steel, which is wonderful to turn up. Even softer than brass, but still has a good steely colour to it. Gluing the axles and cranks in can be very hard though, especially when you consider that super glue takes about 0.3s to grab! In hindsight Araldite might've been a better choice.
When cutting through the axles both sets came apart, but a dab of superglue and it was running even smoother than before!
Give them a good coat of primer. I use some vintage rust preventative that is horribly thick, but I find that dabbing it on give a nice textured finish that looks really authentic once painted with semi-gloss black enamel.
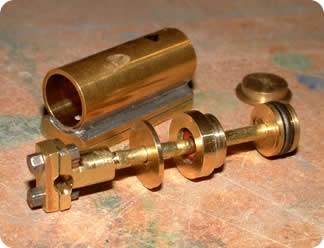
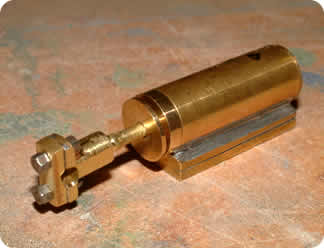
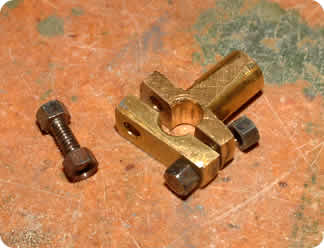
This is one of the fiddlier parts to build. Of course matters weren't helped in my case by the lathe I was using, which was had a huge 6' bed and the drill holder wasn't centered. Very painful! But I got there in the end.
Watch out for shrinking O-rings in this section. A few of mine ended up somehow smaller, which I could've done without! Also make sure that the insides of the cylinders are good and smooth or your pistons will bind. Once you've got the pistons and cylinder made it all starts coming together. I had trouble (read wandering drills and drill bits breaking) making the port face out of solid brass, so I resorted to laminating brass sheet. Not as pretty, and probably more work, but it does the job (I think).
These are fiddly, but worth it. The end result (especially if you manage to do it nicely) is very rewarding. Just make sure that the solder join between each half is good and strong.
Copper tube for the boiler came from a plumber's scrap bin. I could've bought brand new copper tube, but only at $50 a length! Moral of the story is that it pays to ask around :-)
The tube was cut to length with the A4 paper trick and a vivid. End caps were made round a wooden former and annealed with the BBQ. The caps were filed to fit and then silver soldered with the oxy-acetylene torch. At each stage it was pickled in citric acid. Finally the boiler was cleaned up by pitting it in the lathe and using emery paper.
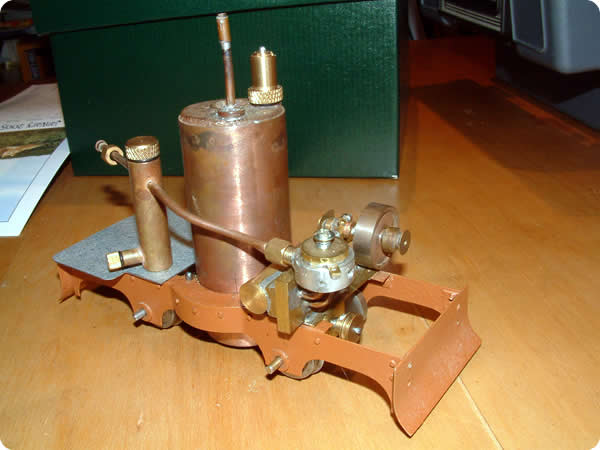
About this stage a test fit was of the pistons was made and I decided to alter the layout of Idris. One of the pistons wasn't sealing properly and the cranks weren't going to work without making a whole new set. So rather than making another pistons so forth, I decided to use the remaining cylinder to make an geared oscillator, driving the wheels via a pulley and worm drive. This should give ample power, though hopefully it won't run too slow.
For Christmas I received a Roundhouse safety valve, regulator and lubricator. For this reasonably small cost I was able to skip over a huge amount of construction work. Next Christmas I got a tap to tap the boiler bushes for the safety valve.
With the boiler tapped, all that remains is to fit the lubricator and regulator to the boiler, then construct the burner and meths reservoir before testing can begin.
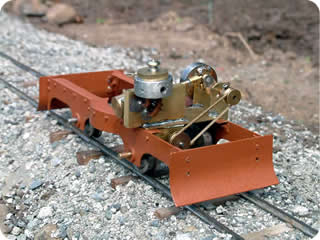
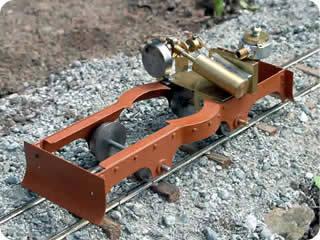
As she stands, Idris currently looks like...